How to Design a Gallery Wall
In the new studio I have three separate gallery wall displays. It’s easily one of my favorite ways to fill a wall and create an amazing focal point and conversation starter. Using your Key Moments images as wall art? You’re talking my language. Doing so in a way that incorporates your favorite art, personal mementos, and family heirlooms; now you’re speaking to my soul.
One of the absolute most rewarding things in my business is when a client sends me pictures of their wall displays incorporating their Key Moments images!
You got your nails done, got your hair done, spent hours laboring over the perfect wardrobe. The shoot went great; so much fun. You got your images back and you were in love. You shared them with your friends and family on Facebook. The end.
Wait, what? Guys, this is why we do this! We are making memories; let’s show them off. Let’s hold them in our hands and create something tangible together to show for all your hard work!
After your session I would LOVE to work with you in person to choose the perfect images to keep, to gift, and to display. Using my knowledge of composition and visual cohesiveness to create beautiful galleries is so fun to me! Ordering sessions are available to all of my clients at no cost to them.
Now, off of my soap box and onto gallery wall 101.
There are three overall styles of gallery walls; symmetrical, eclectic, and themed. I’ll outline each of these below and finish up with a tutorial on how to create your own!
Symmetrical.
Two of the three gallery walls in the studio are in this style. I feel like symmetrical gallery walls are great for beginners and take a little bit of the guess work out of choosing and arranging your pieces. These types of arrangements have the potential to make a big statement.
The first wall consists of four square, wooden, framed prints size 25X25. I balanced them visually by placing the close up images and further back images across from each other diagonally. Another tip- notice how in the top left image our subject, my beautiful friend Nicole, is looking to her left? That is why I started with that image, so she would be looking toward and across the other picture, not toward the corner. For the same reason I placed the the little boy, her adorable son, Flynn, on the bottom right, again looking towards and across the other picture and not into the corner.

Remember to be aware of which direction the subject of your photos are looking and arrange those images appropriately.
The second symmetrical gallery in the studio is a simple one above the mantle. I love these hanging canvases. They deliver such a wow factor and are gorgeous in person. I structured these to feature a light image, dark image, light image to be more visually pleasing.

I structured these to feature a light image, dark image, light image to be more visually pleasing.
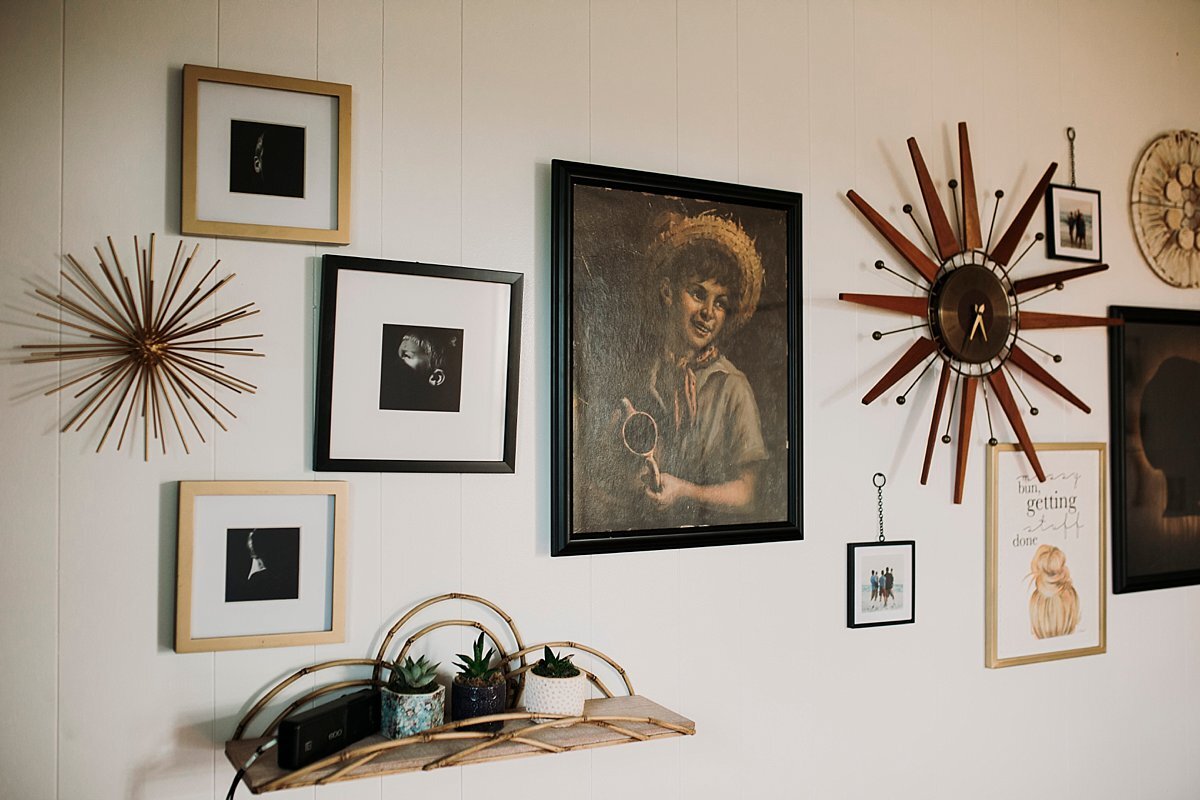
Eclectic.
My favorite gallery wall in the studio is the one in my office. I wrote a little more in depth about the sentimental pieces I included in this blog post. For this display I used mixed media; photographs, decor from Hobby Lobby, and vintage pieces and memorabilia. I came across this vintage clock when cleaning out the studio space. Bart says this belonged to his grandparents and hung in their home in the 70s. I’m a sucker for mid-century mod design so I fell in love with it. I knew this would be the center of the display and based all of the other pieces off of it.

My favorite gallery wall in the studio is the one in my office. I wrote a little more in depth about the sentimental pieces I included in this blog post.
Over the period of a few weeks I collected pieces that I loved. Once I had them all curated I laid them all out on the floor and kept playing with the arrangements until I found something visually pleasing. Remember to vary your element sizes and mix horizontally and vertically orientated pieces. See below for tips on hanging these types of arrangements.
Remember to vary your element sizes and mix horizontally and vertically orientated pieces.
If you don’t have amazing art pieces on hand there are a ton of links like the one included below on Pinterest, it’s a great place to start. You can also find great stuff on Etsy.com and Minted.com.

If you don’t have amazing art pieces on hand here is a link I found for printable, free abstract art you can use to round out your display. There are a ton of links like this on Pinterest, it’s a great place to start.
Themed.
I don’t personally have a display like this in my studio but I am dying to try an all black and white display in sleek, white metal frames. Examples of themed gallery walls could be: black and white, monochromatic, rustic, beauty, rock-n-roll, feminine florals, really the list goes on and on.

This is a beautiful gallery wall following a feminine, floral , and blush colored theme. Shop this pin and find the source at this link.

I’m dying to try a sleek black and white gallery wall theme like this one. This is actually an image from walmart.com selling a 5 piece gallery wall frame kit. Click here to check it out and let me know if you try it!
Tips.
I always recommend taking your time when curating your pieces. As someone who tires easily of things I know it’s important to take your time when selecting your pieces.
Embrace your unique style and tastes! That’s the beauty of it!
Lay all of your pieces on the floor and play with them like a puzzle until you get them arranged in a visually pleasing manner. Remember to be aware of which direction the subject of your photos are looking and arrange those images appropriately.
Here is a great link featuring the home decor queen herself, Joanna Gaines. She shows you how to use Kraft paper and painters tape to create a mock up of your display before hanging. I speak from experience when saying the most frustrating part of a gallery wall *can be* guessing where to drill for your hardware. And guessing again and again and again. In this process the guess work is taken out of the equation. I definitely recommend trying this method.
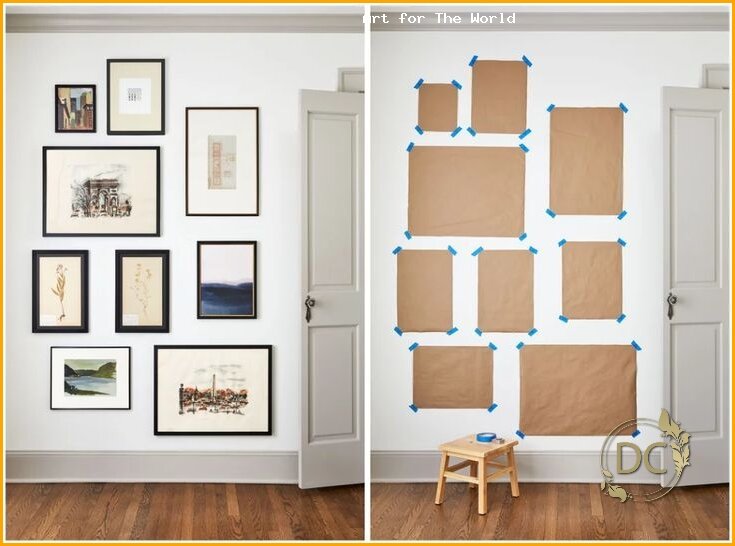
Joanna Gaines Gallery Wall Ideas – Gallery Wall Frames, Art, and Layouts | PEOPLE.com
I hope you enjoyed this post and found it helpful. Do you have a gallery wall in your home? Which style is your favorite? Let me know in the comments and I appreciate it when my friends share these posts on Facebook for more to see!!